As part of the build up to their re:Invent conference in September, AWS introduced their new CloudFormation Designer tool. This tool will allow you to visually create a new stack, or edit an existing one. In fact, it allows you to do all of that in the browser without ever needing to open a text editor. However, as mentioned before I’m not a fan of the JSON syntax that Cloudformation uses.
The below screencast shows you how to work with the Designer, and below that you can find my impression and how it fits.
How does this help you?

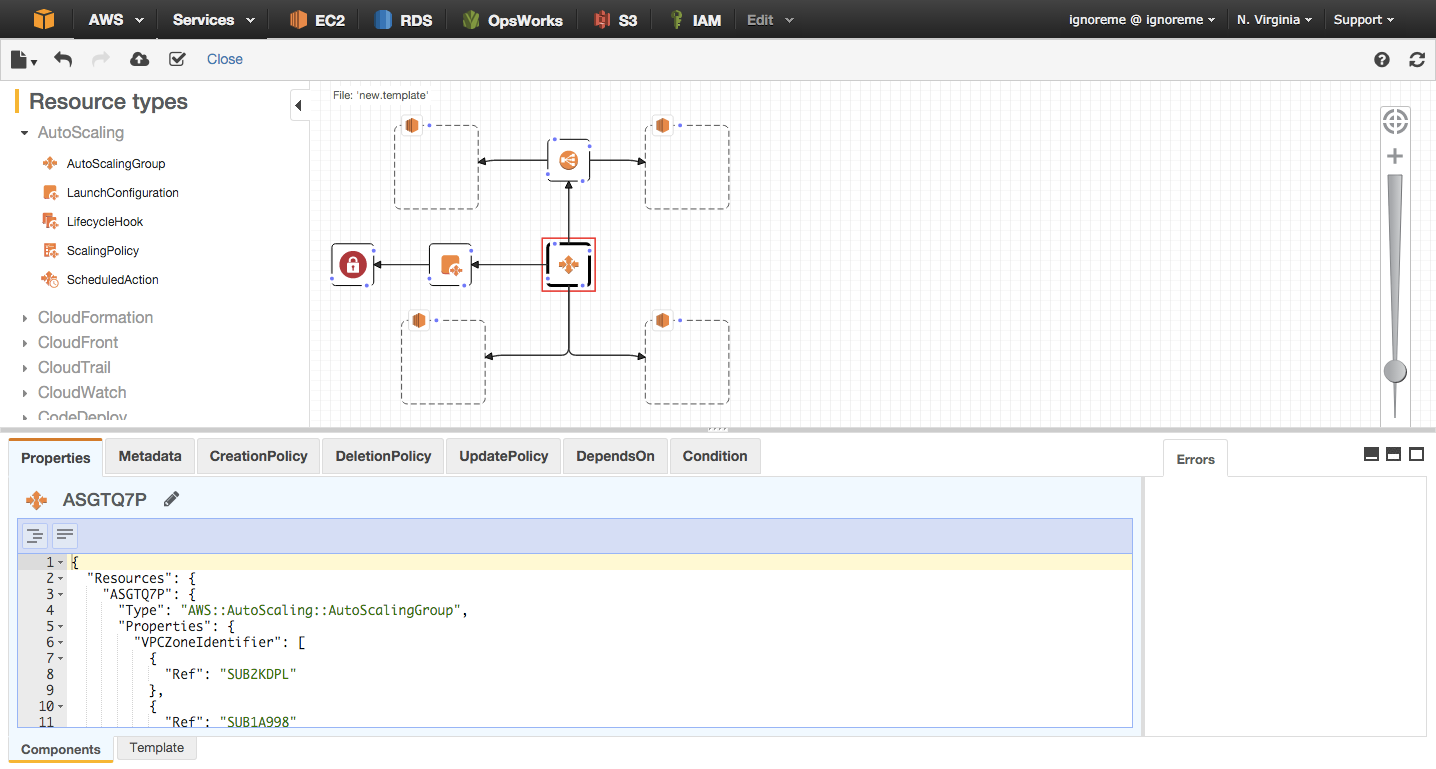
As can be seen in the above image, they have done a good job with making it easier to edit the properties of the components you drag into your design. Connections can easily be made between the different components with helpful drag points (the blue dots) and you can edit the template at either the component level or even the complete template at once.
When using the editor at the component level it will even have different tabs that are relevant to that specific component, with different components having different tabs. Components will have names automatically generated for them. These names will always start with a short form of the component name (LB for a loadbalancer, ASG for autoscaling group, etc.) followed by several alphanumerical characters1. It’s not a bad way of doing it, but you’ll want to change these names so they make more sense to you.
When editing there are also several shortcuts that can make life a lot easier. The most important one of these is CTRL+SPACE, this is the autocompletion. When you type this in the editor when you wish to add a property it will show you a list of unused, valid, properties. When inside the properties, the autocompletion will show any options that might be of use to you there.
There aren’t many shortcuts so below is a complete list2.
CTRL+SPACE: AutocompletionCTRL+F: Search within currently open editor paneCTRL+\: Format the open paneCTRL+SHIFT+\: Strip all whitespace

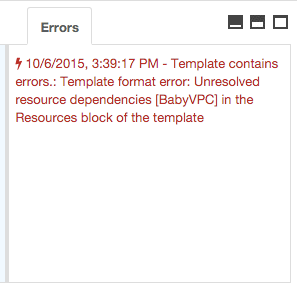
While the Designer will do its best to prevent you from making mistakes, that’s not always possible. For that reason it also has validation built in, which you can trigger manually by pressing the checkbox in the menu bar. If an error then occurs this will show up in the error console.

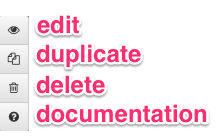
Lastly, right-clicking on a component will show you options for editing the component (which takes you to the component in the editor) as well as duplicating or deleting the component. The last option in the menu is probably the most useful as it links directly to the documentation for the component.
Integrating it into your workflow
So, my first thought after seeing the designer was therefore “Can I use this together with my existing workflow?”. And as it happens, I can. The designer supports both import and export functionality3, allowing for the source/destination to be either on your local machine or on an S3 bucket. This means that you can first use the Designer to design your infrastructure, connecting the different parts of it together, and then export it to improve it. Of course, it is exported in JSON as well, but luckily cfn2dsl exists, which allows us to transform that to the DSL format I prefer to use4.
After making the changes you want, you can then upload your template (compiled back into JSON) to the designer to get an overview of what your modified architecture looks like and even have it validated. Once validated, you can then deploy the stack directly from the designer.
This workflow works quite well, but there is a downside to it. As cfn2dsl doesn’t recognise the metadata provided by the Designer, you will lose the locations of the components. The Designer is quite good at doing an automated layout, but if you just spent a long time putting everything just right you will lose that time.
Limitations
While a great first version, the Designer is far from perfect. No doubt improvements are being made to it all the time, but as I’m writing this I’ve run into the following main issues.
No search
As the number of different components is large, and it’s unlikely that you will know exactly how each of them are organised in CloudFormation it would be great if it’s possible to search or filter the list of components available. This is number 1 on my personal wishlist, even when I know where to look just being able to filter the list will make it work a lot faster.
Single select only
You can only select one component at a time. For most things this is not a problem, but if you want to rearrange things it becomes quite tedious.
No image export
Let’s be serious, we’ve got a great tool here for seeing what our (virtual) infrastructure looks like. Wouldn’t it be great if we could export that diagram into some kind of image format we can than add to our documentation?
Mobile support
Unfortunately the drag and drop functionality doesn’t work on mobile devices. I tested it with an iPad, but it was impossible to do anything useful.f
Limited keyboard shortcuts for visual tasks
Considering the nice auto completion shortcut in the editor, this one might feel a bit like nitpicking. However, several times after I made a mistake I tried hitting CMD-Z to undo moving some elements around only to realise I needed to click on the undo button instead. The same goes for duplicating components. It’s great that we can do these things in the first place, but using a shortcut makes it faster.
Conclusion
From what I’ve seen so far, CloudFormation Designer is a great and helpful product. It will of course have to prove its uses in the long run, not only in how well it handles bigger infrastructures but also how it will evolve. For now though, I’m looking forward to using it.
-
Similar to the format of instance ids, but lacking a dash. ↩︎
-
These are the ones that I’m aware of. It’s possible there are more, in which case I’d be happy to hear about that. ↩︎
-
Actually, they call it open and save in the menubar. ↩︎
-
cfn2dsl has its own way of organising and showing the components and suffers from some limitations itself. Because of this the output will likely look different from what you would write yourself. ↩︎
Read more like this:
- Automating a CloudFormation deployment visualisation dashboard
- Building on the SSO APIs
- Fixing AWS SSO's CloudFormation
- CloudFormation Macros: Transform Your Templates
- Building and Testing CloudFormation Macros
Or always get the latest by subscribing through RSS, Twitter, or email!
