Using the CLI with AWS SSO
In an interesting discussion at work today, someone mentioned a tool that would allow you to only log in once for AWS accounts in an AWS Organization. Which surprised me, as that is built into the way the CLI works with AWS SSO. It turns out that many people were unaware of this. As I tend to complain about SSO, I figured I might as well point out one of the parts I really enjoy about it.
How do you configure this?
Support for logging into SSO using the AWS CLI was introduced with the release of AWS CLI v2. At the time, I mentioned this as one of the main reasons to switch to it but I never went into any detail on how it works. So, let’s have a quick look.
You need to configure your AWS config file. This file can be found in a hidden folder called .aws in your home directory. You can edit this manually to add the relevant parts, or you can use the aws sso configure command to set it up. Below is an example of what it looks like after you’ve filled it in.
[profile ignoreme-admin]
sso_start_url = https://ignoreme.awsapps.com/start/
sso_region = ap-southeast-2
sso_account_id = 123456789
sso_role_name = AdministratorAccess
region = ap-southeast-2
output = json
The values here are pretty self-explanatory, but let me go over them anyway.
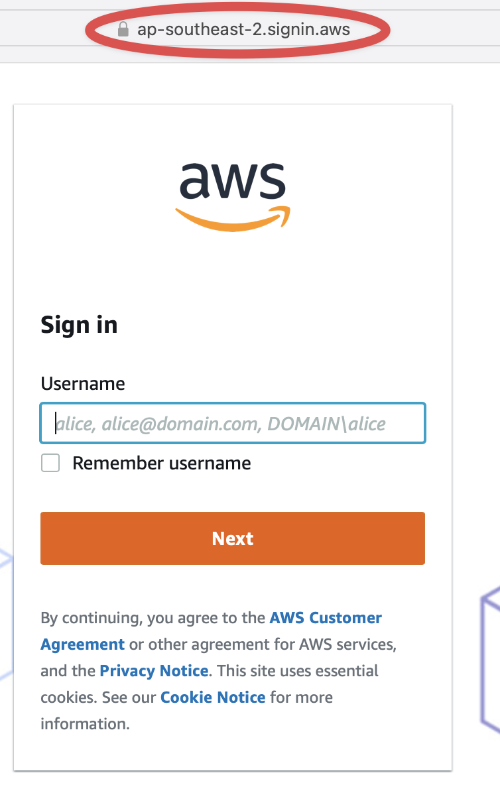
sso_start_url: this is the URL you go to when you access your AWS SSO. And yes, it must include the ridiculous/startpart of the URL.sso_region: this is the region where SSO is configured. Since they changed the log in process earlier this year you can easily find this because it’s part of the URL you are redirected to during this.

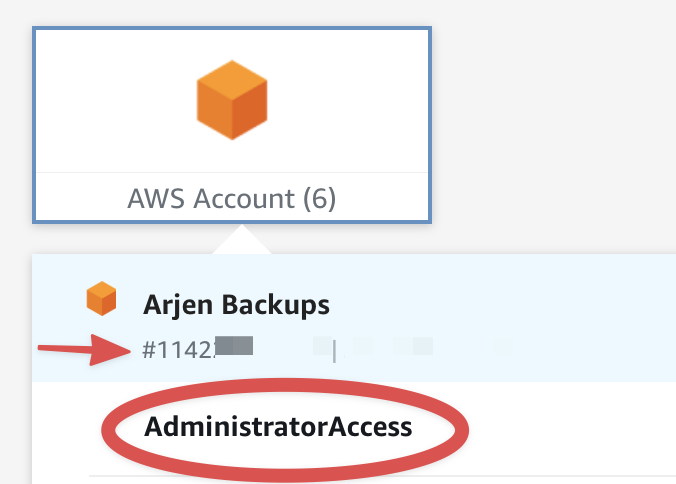
sso_account_id: the ID of the account, you can see this in the overview of accounts when you’re logged in (the arrow in the below image).sso_role_name: the name of the role you want to assume (the circled name in the image below).

Needless to say of course, you need to have access to both the role and account to be able to assume it.
While you can go through the aws sso configure process again when you add a second account, it’s a lot easier to copy-paste and just change what needs to be changed.
[profile ignoreme-admin]
sso_start_url = https://ignoreme.awsapps.com/start/
sso_region = ap-southeast-2
sso_account_id = 123456789
sso_role_name = AdministratorAccess
region = ap-southeast-2
output = json

[profile arjen-backup]
sso_start_url = https://ignoreme.awsapps.com/start/
sso_region = ap-southeast-2
sso_account_id = 123456780
sso_role_name = AdministratorAccess
region = ap-southeast-2
output = json
Logging in and switching between the accounts
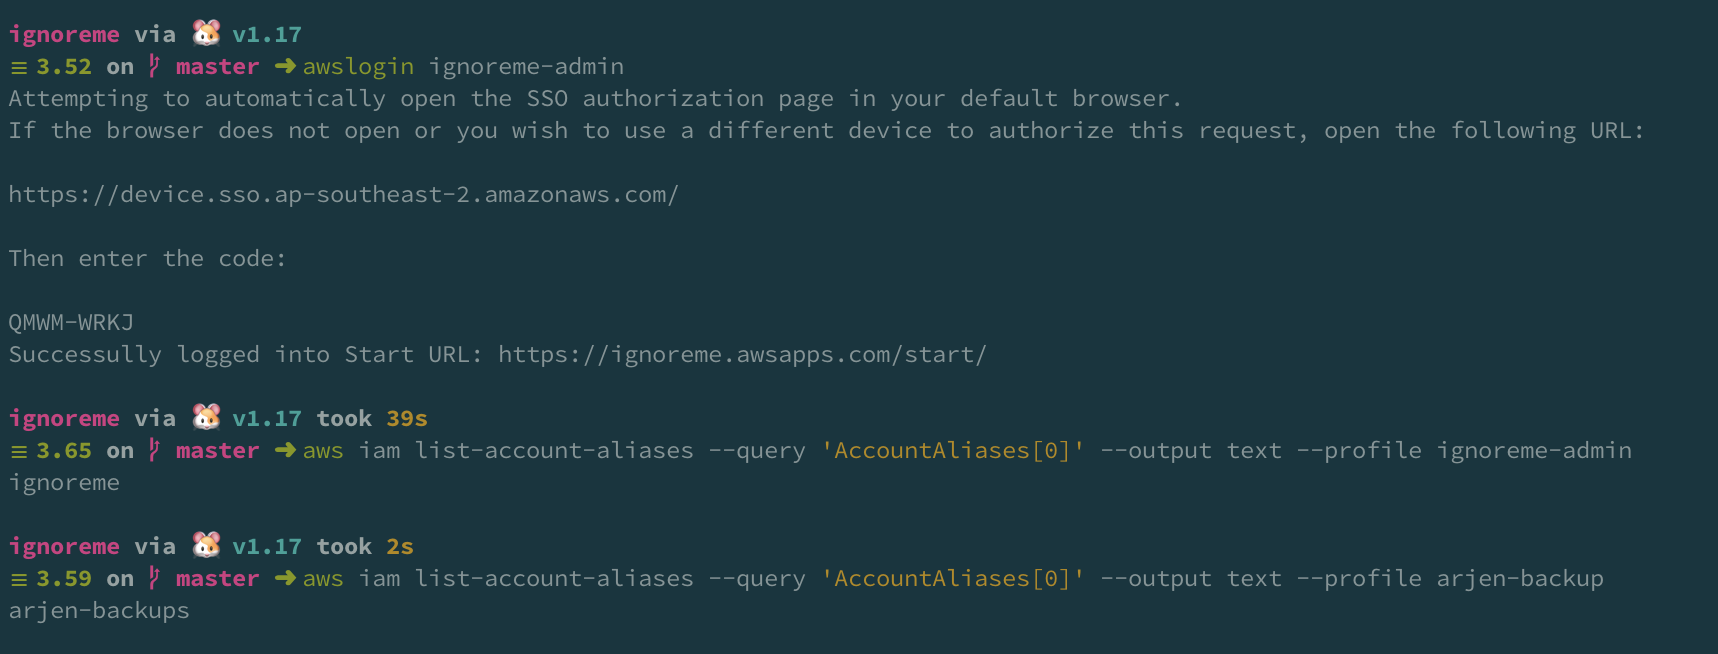
Now that we’ve got this configured, we can start using it. The command to know here is aws sso login --profile $profilename. You only run this once per AWS SSO start URL. Which means that if I run
aws sso login --profile ignoreme-admin
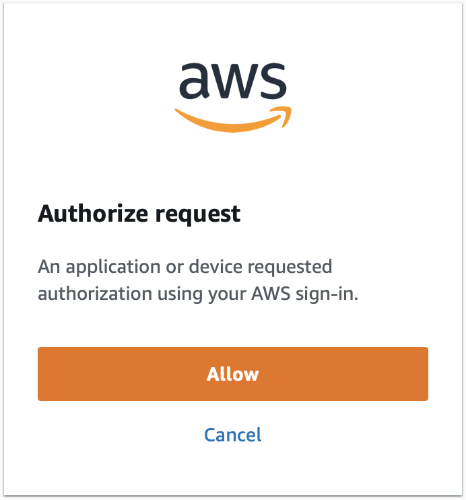
It will authenticate me for both the ignoreme-admin and arjen-backup accounts. For the authentication it will redirect you to a browser where you follow the regular SSO login steps (if you’re not already logged in) and then ask if you want to grant an application access.

Interestingly it doesn’t tell you what application (or device) wants the access, but assumes that you will know. And once you grant it, we can use either profile as we wish.

It doesn’t get much easier than that.
Now, personally I don’t like using --profile flags in my commands, so instead I set the profile using environment variables: export AWS_PROFILE=ignoreme-admin1. In addition, I’ve got my theme configured in such a way that it shows me the current role and account I’m using in addition to the region if I define that explicitly.

If you’re interested in that functionality or any of the other helper functions I use, feel free to have a look at them in my custom_zsh GitHub repo.
-
Technically speaking I use the function asp from the oh-my-zsh aws plugin but that does the same thing. ↩︎
Read more like this:
- aws-sdk-go-v2 is finally GA
- Building on the SSO APIs
- Fixing AWS SSO's CloudFormation
- EC2 Instance Naming Explained
- Automating a CloudFormation deployment visualisation dashboard
Or always get the latest by subscribing through RSS, Twitter, or email!
