As you may be aware, I sent updates of this site out by email. Since the very start I’ve used Convertkit for this, but this was getting too expensive. However, it was the only email service I found that will immediately send an email instead of on a schedule. So, I had to automate this.
The old situation
The email subscription option was added to the site when I got requests for it, but in my mind it should work like an RSS feed. By which I mean that you shouldn’t have to wait until an arbitrary time to receive the update. And most of all, I1 didn’t like the idea of needing to pay attention to the time when posting something. What if I was 5 minutes too late for the deadline? It would take a day before the email went out!
Which is why I originally went with Convertkit, they offered this functionality out of the box, and I’m quite happy with it. It’s not perfect though, as I had to still approve of the email being sent and most importantly I had to change a couple of things about it. I prefer the emails to have a title that starts with the site name e.g. ig.nore.me - Automating Mailchimp and start the email with the title of the article that links to the web version.
Those are minor inconveniences though, and I had a couple of Workflow scripts2 that allowed me to make those edits in a matter of seconds. So, if this all worked quite nicely why did I want to change? Well, the costs. Convertkit doesn’t have a free tier, and when doing a review of my subscription services it came out at the top as the most expensive one. And quite frankly, it isn’t worth it for what I do with it. It’s a convenience for those of you who like to receive their updates through email without any benefit to me.
So, I looked at the alternatives again, and again didn’t find anything that matches my exact needs. Spurred on by the idea of saving money3, I decided that meant I had to write a solution.
Enter Mailchimp
Mailchimp is a well-known email service, and it has all the bells and whistles anyone needs. It also offers integrations with various CMSs that will allow you to send email updates immediately after you post an article. And it offers the option to send a summary of your RSS feed once a day. Oh, and it has a free tier for up to 2000 subscribers. Considering my current subscriber number, I won’t reach that anytime soon.
All of this is nice, however it doesn’t solve the problem I wanted to solve. As I have a static site, I can’t use those other integrations and it doesn’t let me send an email from my RSS feed immediately after it’s been updated. However, the other strength of Mailchimp is its API. This can be used to do what I want.
The template
First things first, I needed to update the email template I’ve been using to work with Mailchimp. Now, as I mentioned Mailchimp allows you to create templates that take the last X number of items from your feed and send a summary on a daily (or weekly/monthly) basis. So, what I did is to use this functionality but limit it to only the last item and then show exactly what I want to show. Mailchimp’s guide for bloggers has a good explanation of the various tags you can use for this. The rest of what you see in the attached image is just formatting and reuse of the template I already had.

Lambda
For accessing the API I doubt it comes as a surprise that I chose to use Lambda, but it might come as a surprise that I wrote the code in NodeJS. Mostly this is because I want to try other languages even when I’m not as familiar with them, just so I don’t lose sight of their strengths4. And when it’s something relatively small it makes sense to use a scripting language instead of having to compile it.
Reasoning aside, let’s look at the code. But first, a disclaimer! I’m not good at NodeJS, and I have no doubt I could’ve done the same thing in a cleaner way. However, this solution works and most importantly doesn’t require any external dependencies. No need for npm, or things like that. You can just copy in the code and paste it in a Lambda function5. That said, feel free to make any suggestions. As always, the code is available on GitHub.
	exports.handler = (event, context, callback) => {
	  if (process.env.TOKEN !== "" && event.token == process.env.TOKEN) {
	    CreateCampaign(event, callback);
	  }
	};
The API doesn’t support what I want to do in a single call, so I’ve split it up in 3 functions that are called in succession when the previous one finishes. First up, after a check for the security token, is creating the campaign.
	function CreateCampaign(event, callback) {
	    var create_body = {
	    	"type": "regular",
	    	"recipients": {
	    		"list_id": process.env.LIST_ID
	    	},
	      "settings": {
	    		"subject_line": event.title,
	    		"title": event.title,
	    		"from_name": process.env.SENDER_NAME,
	    		"reply_to": process.env.REPLY_TO,
	    		"inline_css": true
	    	}
	    };

	    var options = {
	      hostname: process.env.HOSTNAME,
	      port: 443,
	      path: '/3.0/campaigns/',
	      method: 'POST',
	      auth: 'anyuser:' + process.env.APIKEY,
	      headers: {
	          "Content-Type": "application/json",
	          'Content-Length': Buffer.byteLength(JSON.stringify(create_body))
	      }
	    };
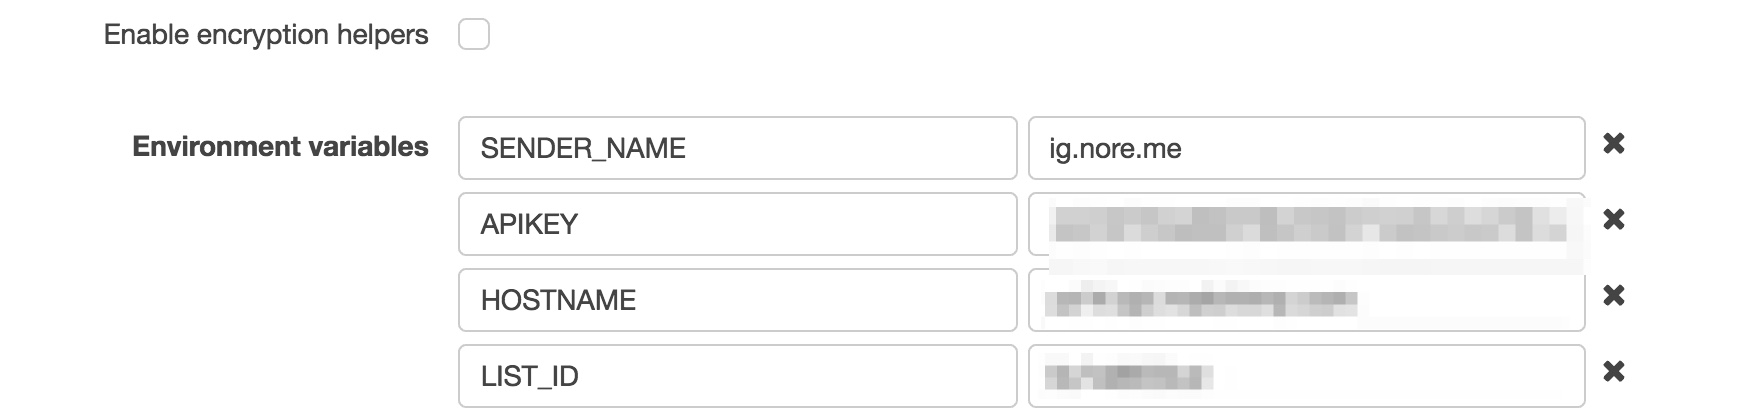
Here, you see the prep work for calling the API endpoint, with the various options defined. The interesting part here is something I haven’t shown in use before and was introduced late last year: environment variables. In a weekly update I mentioned their introduction, and at the time I thought it would be mostly useful for multiple environments. Turns out, it’s also very useful if you want to share your code publicly.
So, how do they work? Well, you access them as you usually would with environment variables in your code6: process.env.HOSTNAME. In here, HOSTNAME is the name of your variable and using the Console you define the value of it below your code as shown in the image below.
Or of course, you can define it using the CLI’s --environment flag when you either create the function or update it’s configuration. You can optionally choose to encrypt your environment variables, but obviously your code will then need to decrypt them. Yes, I would recommend doing this when you use values like API keys, even though this function obviously doesn’t support it. What can I say? Sometimes I’m lazy7.
	    const req = https.request(options, (res) => {
	        let created_body = '';
	        res.setEncoding('utf8');
	        res.on('data', (chunk) => created_body += chunk);
	        res.on('end', () => {
	            if (res.headers['content-type'] === 'application/json; charset=utf-8') {
	                created_body = JSON.parse(created_body);
	                UpdateCampaign(created_body.id);
	            }
	            callback(null, created_body);
	        });
	    });
	    req.on('error', callback);
	    req.write(JSON.stringify(create_body));
	    req.end();
	}
The next step in the code is to actually call the create campaign endpoint defined earlier and parse out the id of the campaign that was created. Pretty standard stuff really.
And in fact, the rest of the code is very much the same. You see my call here for the UpdateCampaign function, which calls the endpoint where I define my earlier mentioned template. It seems like a strange oversight that setting a template requires an additional call, when you can define everything else in the create call, but that’s how it is.
At this point it will come as no surprise that this function in turn will then call a SendCampaign function which will send the campaign. Due to their repetitious nature, I won’t show these functions here. If you do want to have a look at them, have a look at the file on GitHub.
Starting the Lambda function
The final piece of the puzzle. The function described above does a good job of actually preparing and sending the email, but it doesn’t check my RSS feed. Which is fine, as it doesn’t have to do everything. If you paid close attention to the code, you probably already noticed that it will receive a trigger that contains a title value. Which is indeed the case. However, here my laziness came to the front again. To do this properly I probably should have built something that checks the RSS feed or S3 bucket and triggers the sender function when it detects a new article.
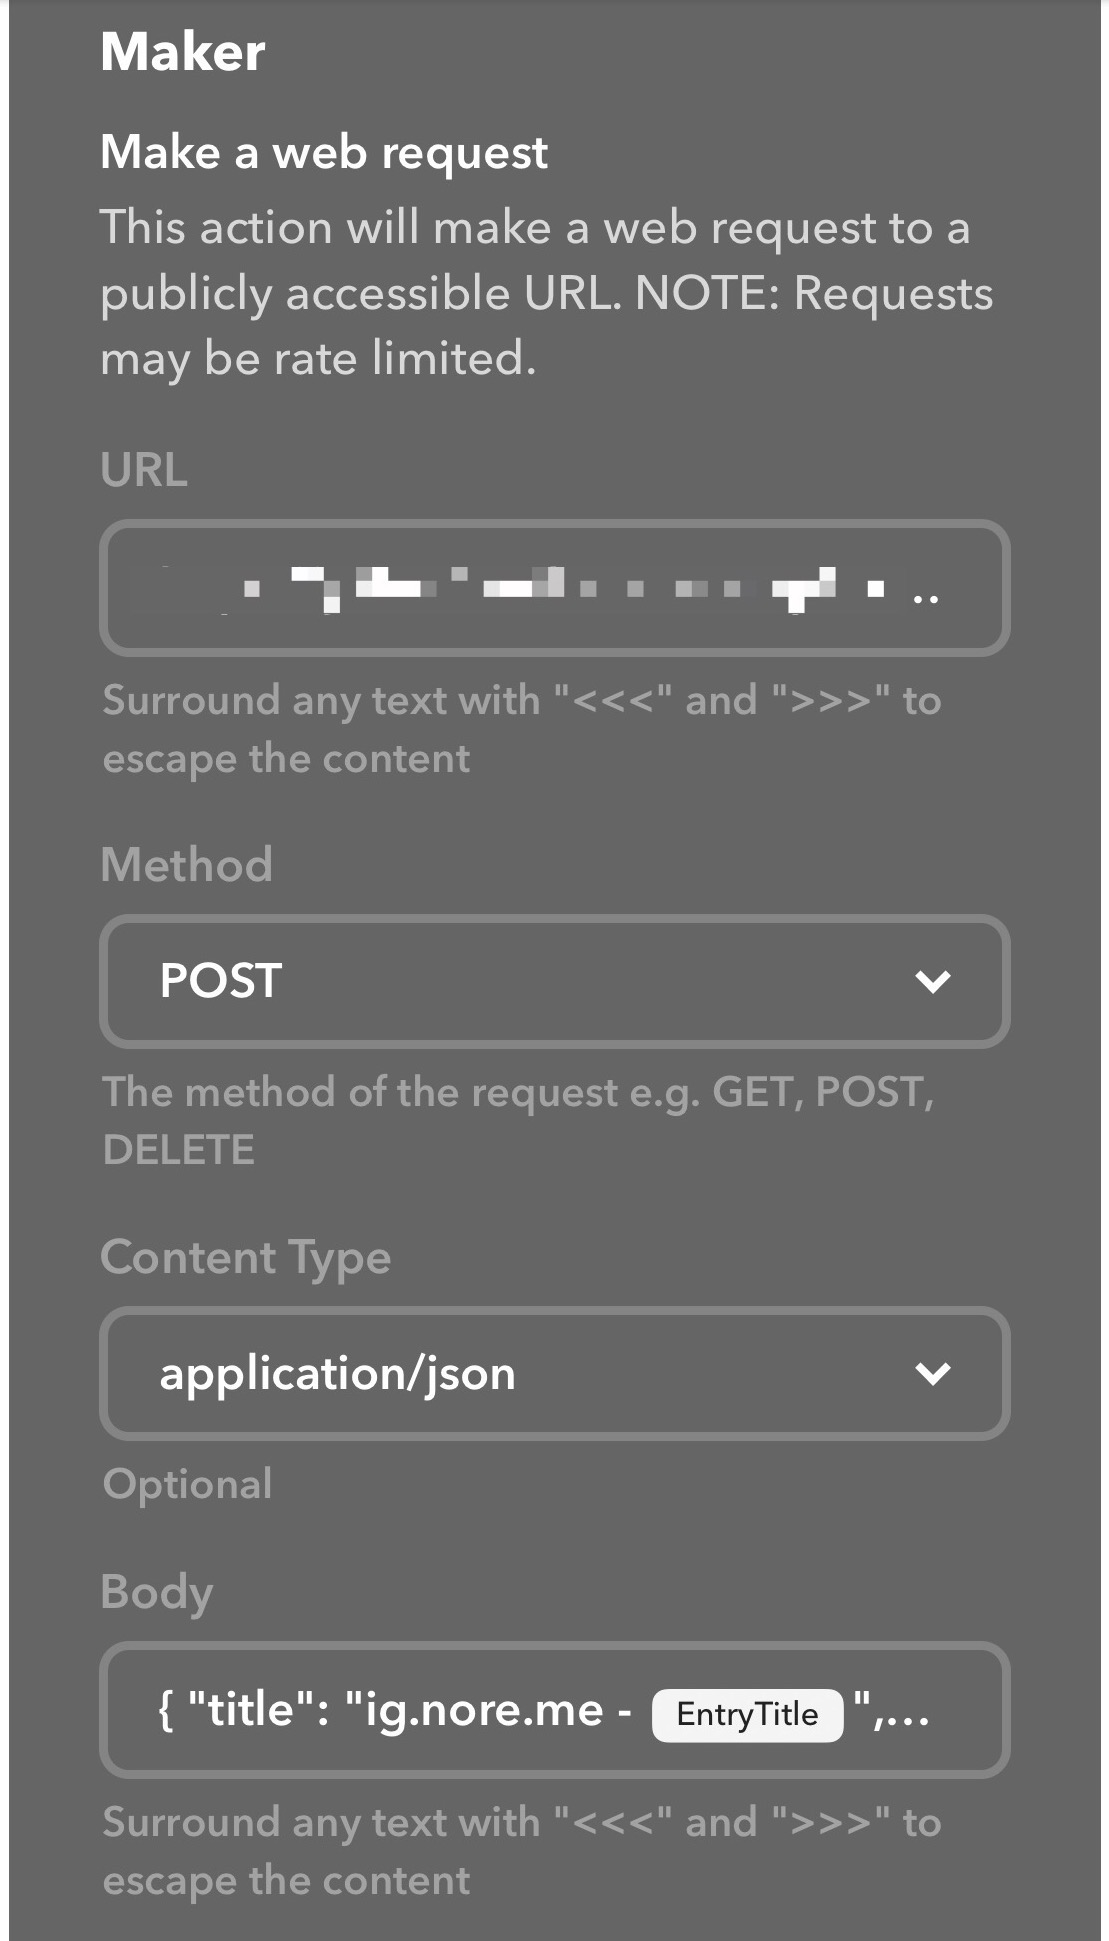
But you know what? There are existing solutions for that sort of thing. So, instead I made use of IFTTT for that. Combining the Feed and Maker services, I let that check for updates and trigger the Lambda function through an API Gateway, with the title prefixed the way I want it8.
The Cleanup
A short assurance for those of you who have subscribed in the past. I moved over all subscribers to Mailchimp, deleted them from Convertkit, and then cancelled my account there. This should assure that your email addresses are no longer in their database. If this does not satisfy you, feel free to unsubscribe.
The result
With the above setup I can now ensure the emails for this site get delivered the way I want, when I want, and at no cost. The only difference for email subscribers is a small Mailchimp logo at the bottom of the email, exactly like you find at many other mailing lists. And of course, if you read this and don’t subscribe to my site in one way or another, feel free to do so at the Keep up to date page.
-
Yes, it’s all about me. ↩︎
-
I’ve been planning to write about these for a while, but instead I’ve just made them redundant. ↩︎
-
Due to the dropping Australian dollar it was closing in on $500 AUD per year. ↩︎
-
In fact, I’ve created a couple more Lambda functions in other languages that I should write about soon. ↩︎
-
Yes, I based it on one of the example template and fiddled until it did what I wanted. ↩︎
-
This is obviously a NodeJS example. Make sure to use your chosen language’s syntax. ↩︎
-
Also, I will probably update this at some point. ↩︎
-
The security token is there as well, but iOS IFTTT doesn’t show it until you click the edit box. ↩︎